
Pink Pagoda Accessories
My friend, Jennifer from the blog The Pink Pagoda has beautiful prints. My Custom Pink Pagoda Frame post that I did five months ago, still remains one of my all time most popular. I have featured some of Jennifer's work here, here, here...and here. I guess I really love her sense of design.
Jennifer is branching out and designing other items. She has some cool products on Zazzle. Like this iPhone case


Here comes the group participation part....Jennifer wants to know what other products she could design and create using her images...HOW FUN!! If you are not familiar with her images, you can get a crash refresher course here. I love giving people my opinion....so, Jennifer...how about these ideas (all with your own images, of course)
An elephant tray
 |
| Source |
An elephant ice bucket
 |
source |
A pagoda cheese tray
 |
| Source |
A pink pagoda napkin holder
 |
| Source |
A pink pagoda waste basket or tissue box
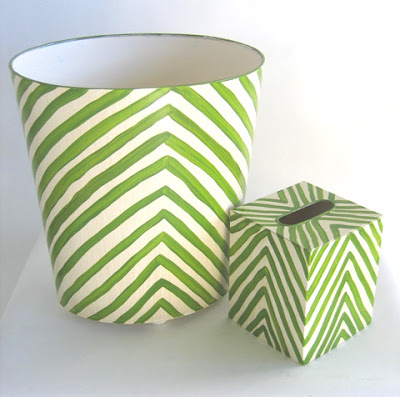 |
| Source |
Ok, those are a few of my ideas for The Pink Pagoda...what products do you think Jennifer should add to her product line? Here is your chance to play Project Pink Pagoda!
One Room Challenge (week 4)
Hello, and thanks for coming back. Before I begin, I would like to thank Saved By Suzy and My Uncommon Slice of Suburbia for featuring my china hutch. It is the best feeling to see your creativity on another blog!
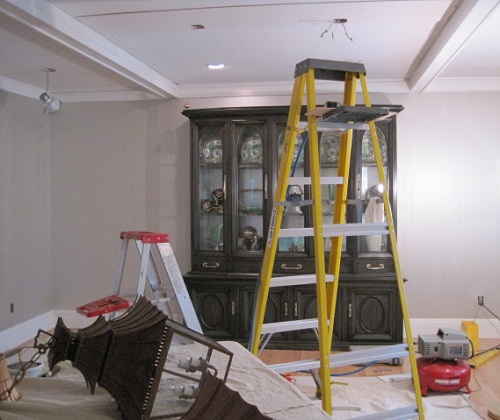
This is week 4 of the One Room Challenge. In case you are new here, you can start the challenge series here. The weeks continue to fly by. It is definitely time to prioritize and let the small things fall off the list. Here is the progress in my dining room
My ceiling is finished
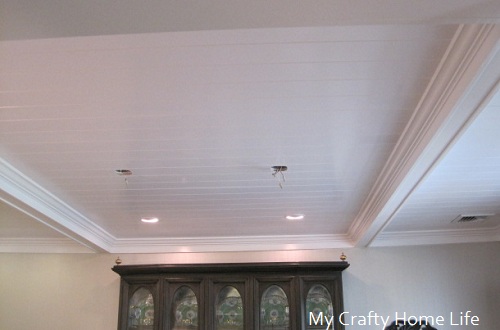
If you would like to know how I installed the planks, you can go here. Now remember, the final coat of paint was applied by a professional painter...and well worth it!
Remember this screen I showed you
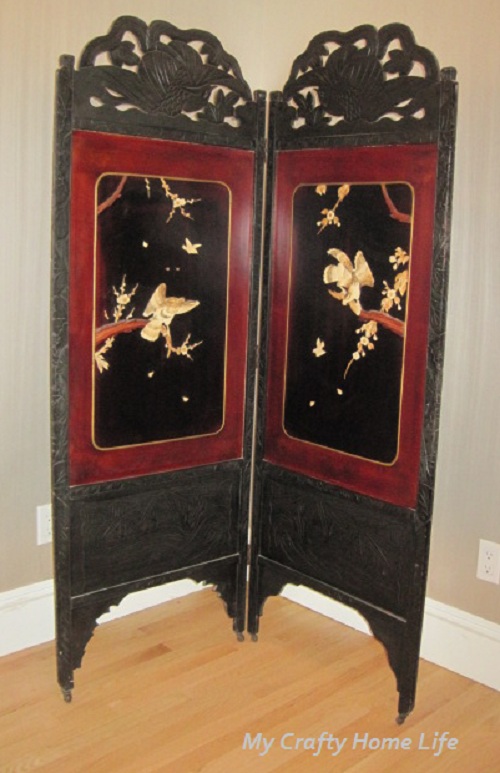
Well, I decided to deck it out a bit. First, I primed the black frame and then applied a high gloss finish. Once that was dry, I decided to add gold highlights to the carvings
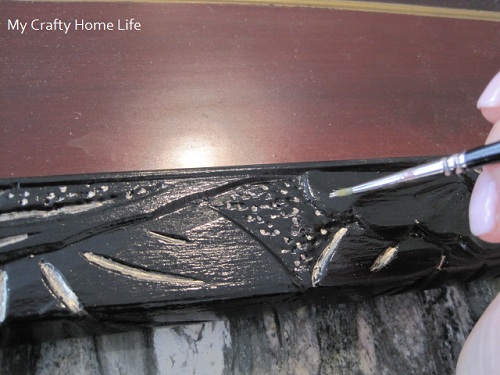
This became so tedious, I hired my daughter to finish it. She still has more to do.
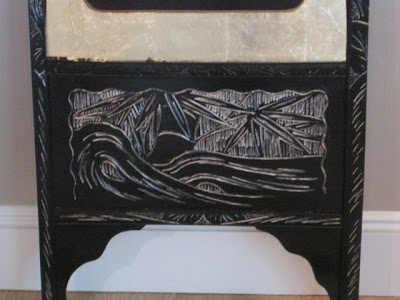
I also applied gold leaf. It still needs touching up and the missing pieces have not been put back...but you get the idea
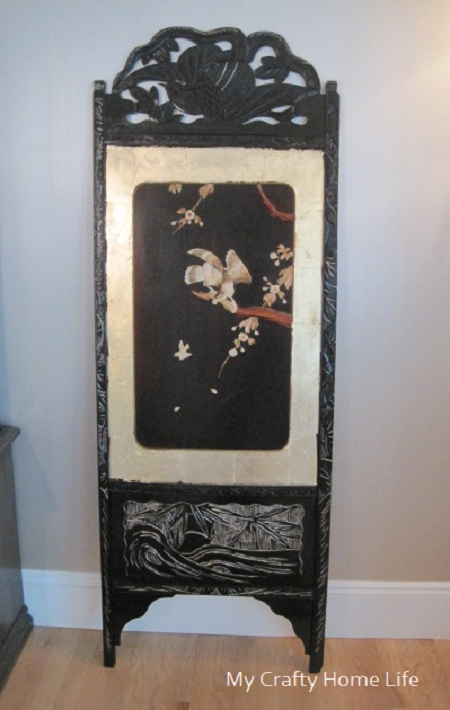
I also separated the two and will hang them on both sides of the china hutch as artwork.
There is progress in my corner,

It now looks like this

I may paint the top half another color...still not sure...OR just the edges with the blue I am using on the lanterns. What do you think?
Speaking of lanterns, I have run out of blue paint and am waiting for Michaels to get a delivery. So, I can't hang them...but here is a better look at them
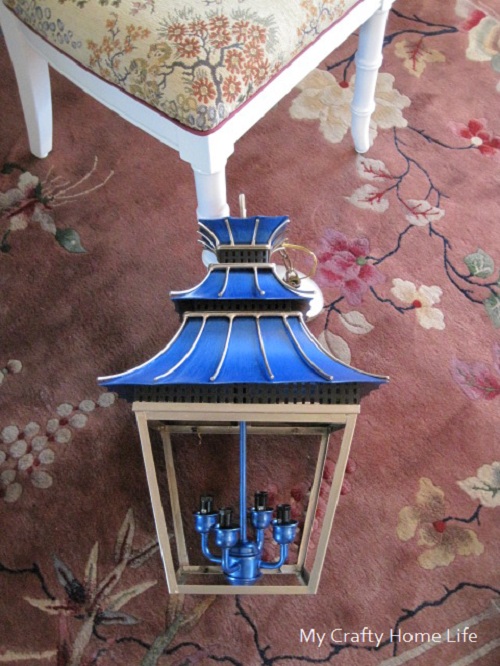
I am not sure if they need a black glaze on them to tone them down. I need to see them in place before I can decide that. This is the direction my room is headed
I had no idea when I started that it would evolve into this...but I think I love it! Thanks for checking in with my room, now let's go make the rounds to the other rooms and see how they are doing. For week 5 go here.
Saved By Suzy Nicole Scott Designs
Dutch.British.Love Kim Macumber Interiors
Trapped in North Jersey Rue de Emily
The Pink Pagoda refreshed designs
Nana Moon Shop Taylor Morgan
insideways House Four
Living Savvy (A Lifestyle Thing)
This is week 4 of the One Room Challenge. In case you are new here, you can start the challenge series here. The weeks continue to fly by. It is definitely time to prioritize and let the small things fall off the list. Here is the progress in my dining room
My ceiling is finished
If you would like to know how I installed the planks, you can go here. Now remember, the final coat of paint was applied by a professional painter...and well worth it!
Remember this screen I showed you
Well, I decided to deck it out a bit. First, I primed the black frame and then applied a high gloss finish. Once that was dry, I decided to add gold highlights to the carvings
This became so tedious, I hired my daughter to finish it. She still has more to do.
I also applied gold leaf. It still needs touching up and the missing pieces have not been put back...but you get the idea
I also separated the two and will hang them on both sides of the china hutch as artwork.
There is progress in my corner,
It now looks like this
I love the way it glows at night. I decided to repurpose the original shades and just add a bit of paint to them
Speaking of lanterns, I have run out of blue paint and am waiting for Michaels to get a delivery. So, I can't hang them...but here is a better look at them
I am not sure if they need a black glaze on them to tone them down. I need to see them in place before I can decide that. This is the direction my room is headed
I had no idea when I started that it would evolve into this...but I think I love it! Thanks for checking in with my room, now let's go make the rounds to the other rooms and see how they are doing. For week 5 go here.
Saved By Suzy Nicole Scott Designs
Dutch.British.Love Kim Macumber Interiors
Trapped in North Jersey Rue de Emily
The Pink Pagoda refreshed designs
Nana Moon Shop Taylor Morgan
insideways House Four
Living Savvy (A Lifestyle Thing)
One Room Challenge (week 3)
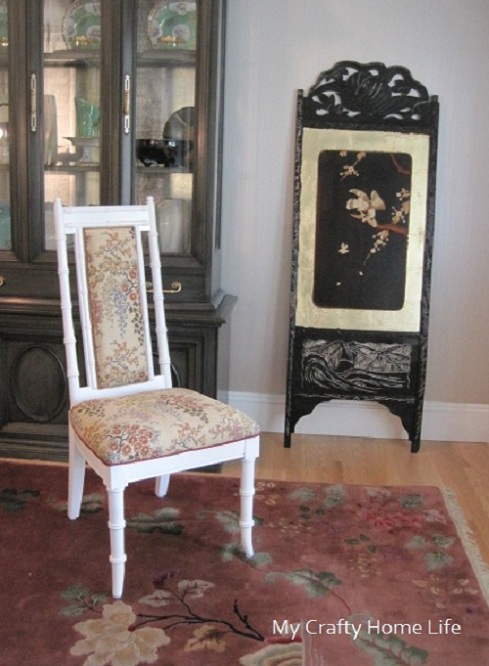
Hi Everyone, thank you for coming back! This is week 3 in the One Room Challenge. In case you are new here, you can start the challenge series here. This week, I think I made a fair amount of progress with my room. I managed to finish my side chairs. If you have not seen them, you can check them out here. This is how you last saw my dining room
I also finished the planks on the ceiling and I LOVE it!! Unfortunately, if you follow the #1RoomChallenge on Twitter, you know I fought hard to get the semi-gloss ceiling finish looking good. I love the way it looks here. However, working overhead on a ceiling when you are only 5'3" (on a good day) is a challenge. After the entire weekend of up and down on the ladder, I broke down and called a painter. He is here today putting the finishing coat on it. On the bright side, since I did ALL the prep work and one coat, it isn't costing very much (hey, a tip!).
Moving on, this corner (before)
Now looks like this
And this pine piece (before)
Has been relocated to another room, and replaced with this piece that I had
It is cream and could use a fresh coat of paint. Do I paint it cream again, or white?
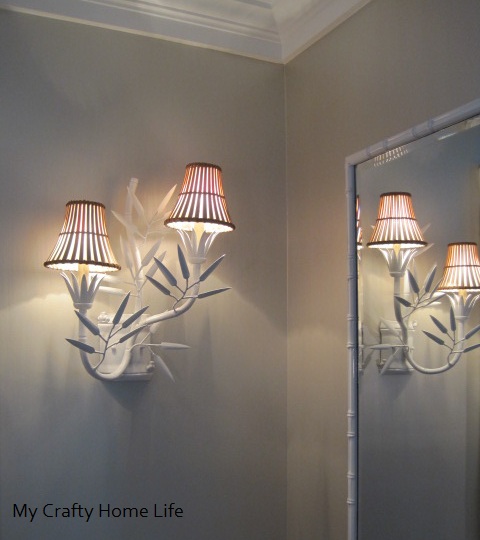
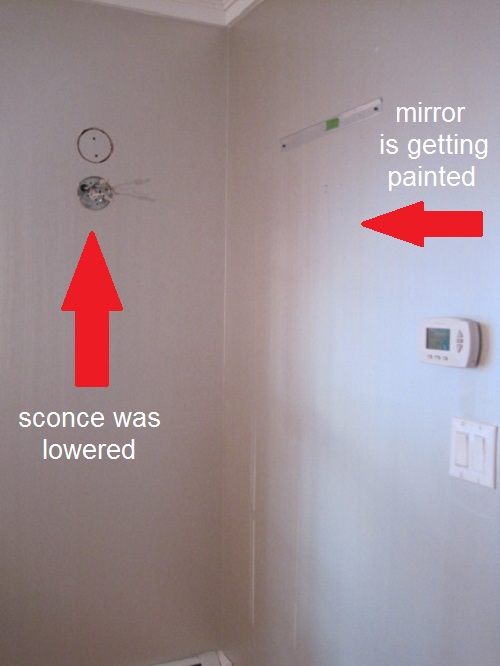
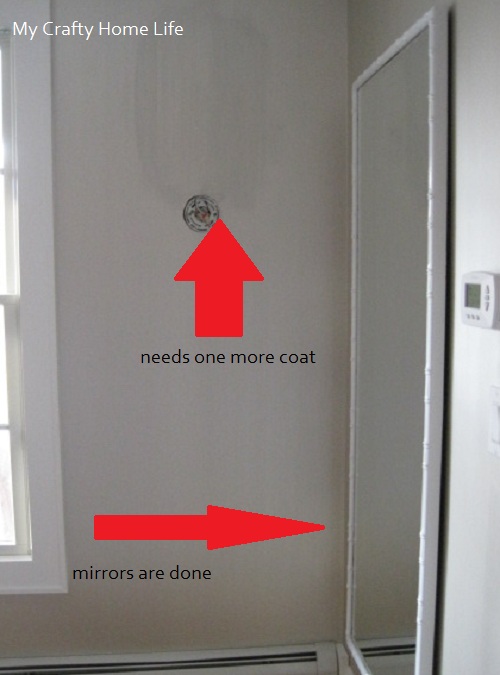
The sconces also got a fresh coat of paint. From this

To this

What color shades do you think I should do?
Remember when I asked you what color I should paint my lanterns? Well, here is a peak into the direction I think I am going

The 6 weeks are flying by and I am not sure how it is going to end. I can't wait to come back and find out. Thanks for checking in with my room, now be sure to make the rounds to the other rooms and see how they are doing. For week 4, go here
Saved By Suzy Nicole Scott Designs
Dutch.British.Love Kim Macumber Interiors
Trapped in North Jersey Rue de Emily
The Pink Pagoda refreshed designs
Nana Moon Shop Taylor Morgan
insideways House Four
Living Savvy (A Lifestyle Thing)
The sconces also got a fresh coat of paint. From this
To this
What color shades do you think I should do?
Remember when I asked you what color I should paint my lanterns? Well, here is a peak into the direction I think I am going
The 6 weeks are flying by and I am not sure how it is going to end. I can't wait to come back and find out. Thanks for checking in with my room, now be sure to make the rounds to the other rooms and see how they are doing. For week 4, go here
Saved By Suzy Nicole Scott Designs
Dutch.British.Love Kim Macumber Interiors
Trapped in North Jersey Rue de Emily
The Pink Pagoda refreshed designs
Nana Moon Shop Taylor Morgan
insideways House Four
Living Savvy (A Lifestyle Thing)
Missing Pieces
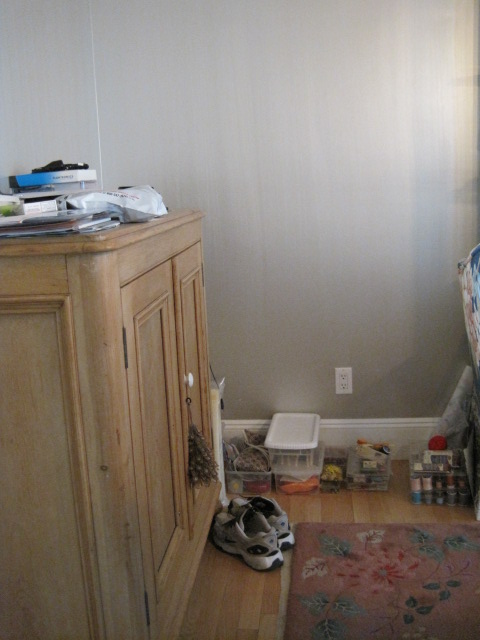
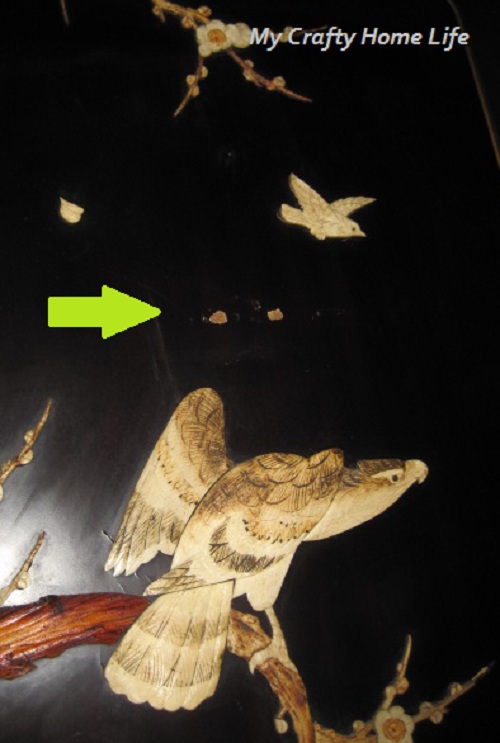
I forgot that I had this wonderful chinoiserie screen in my garage. It came from Canada and was my husband's grandmothers'. I always liked it....and it could be perfect for my dining room. There is only one problem...
It has several missing pieces. I think they are carved bone? I know it is not ivory. It might even be plastic? I have sourced, all over the net for something that would work.
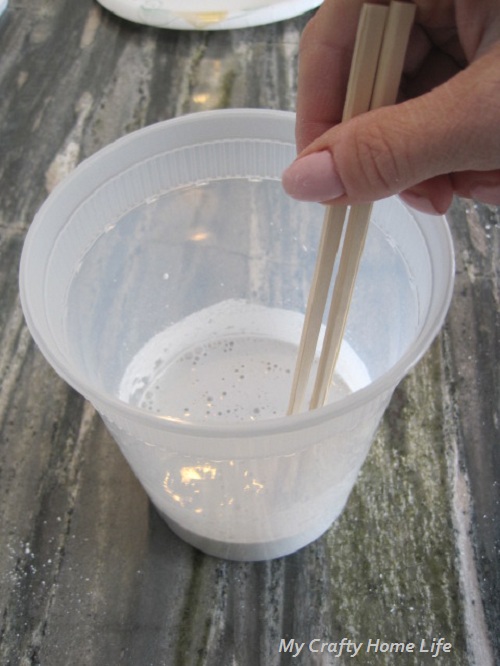
Then I remembered something about making a mold....more searching, and I found this stuff
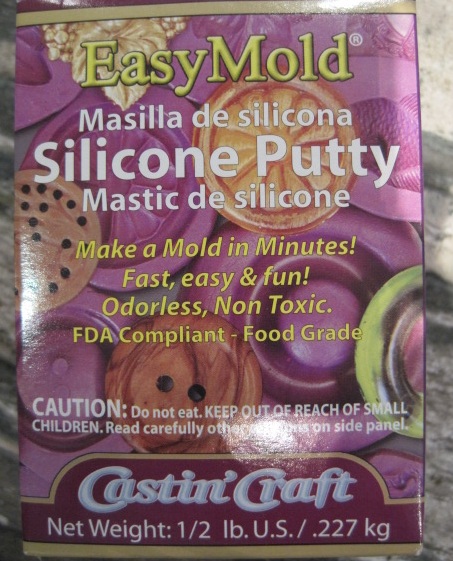
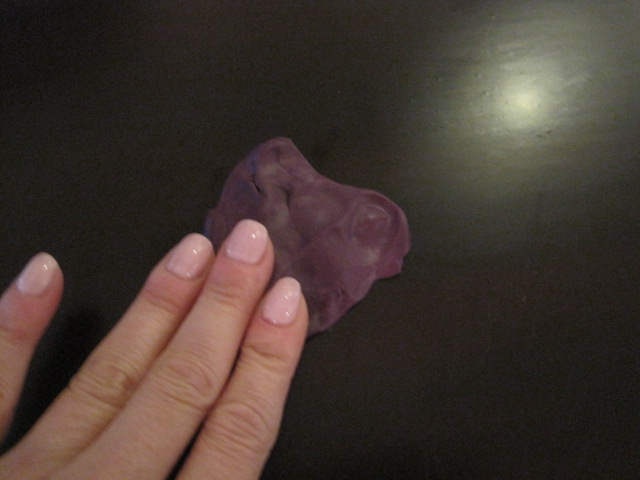
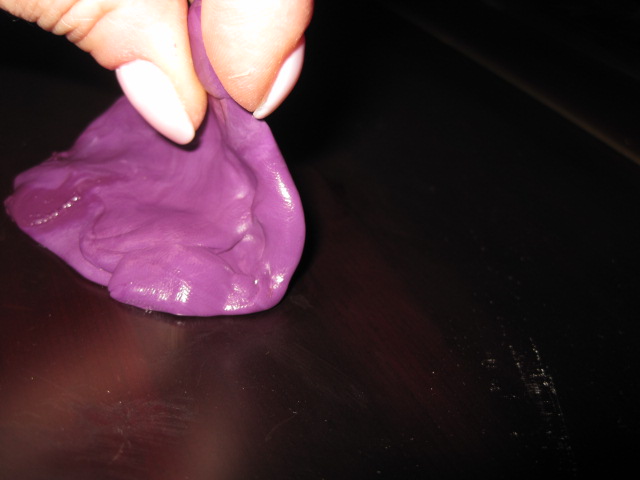
You mix equal parts of the purple and white together
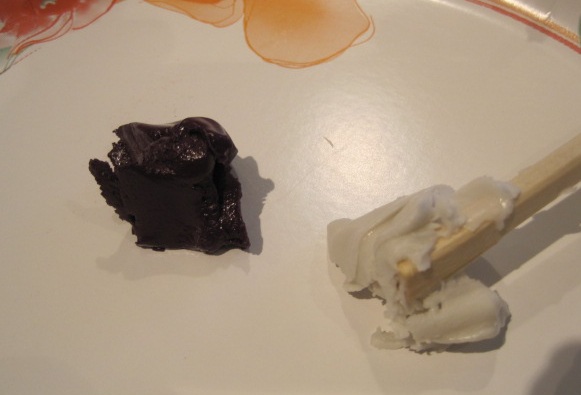
It's non toxic, so you can use your hands. Once you get a uniform color
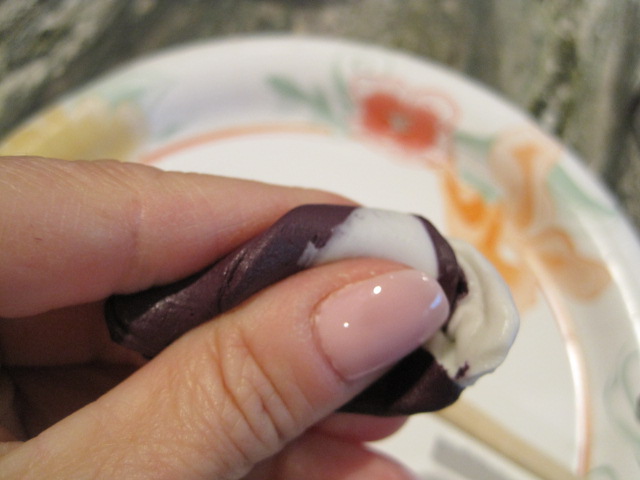
You press it over the image you want to make a mold from
Wait 25 minutes, and then peal it off
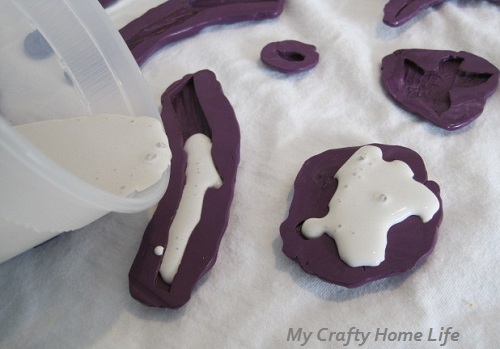
Now you need to fill the mold. So, I used this stuff
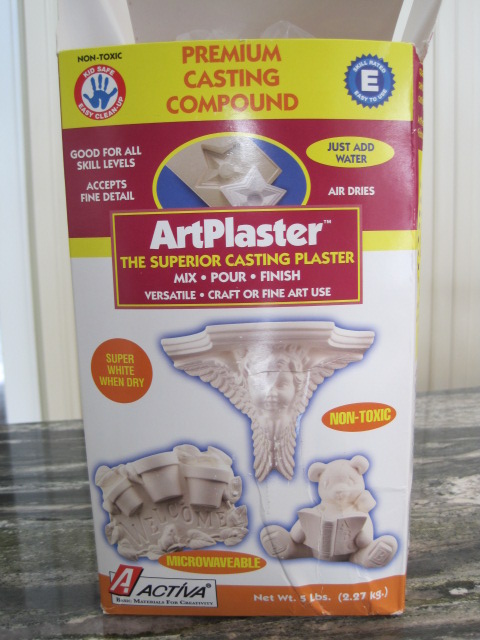
Mix according to directions
Pour into molds, and wait until....no specific time at least 30 minutes depending on size (makes sense)
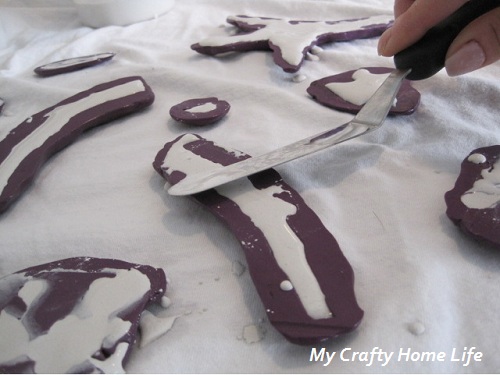
I smoothed the top with a spatula
Here are two of the ones I made....I think this will look great, once I paint it.
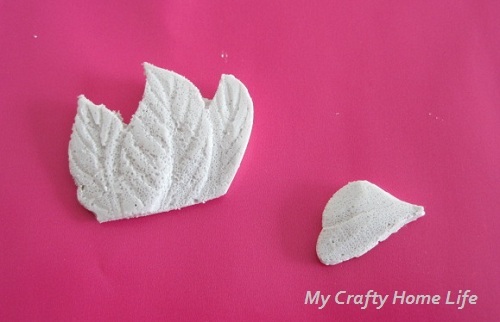
Hopefully, I will have the "after" next week. What are you working on?
**Linking to**
Not Just A Housewife
It has several missing pieces. I think they are carved bone? I know it is not ivory. It might even be plastic? I have sourced, all over the net for something that would work.
Then I remembered something about making a mold....more searching, and I found this stuff
You mix equal parts of the purple and white together
It's non toxic, so you can use your hands. Once you get a uniform color
You press it over the image you want to make a mold from
Wait 25 minutes, and then peal it off
Now you need to fill the mold. So, I used this stuff
Mix according to directions
Pour into molds, and wait until....no specific time at least 30 minutes depending on size (makes sense)
I smoothed the top with a spatula
Here are two of the ones I made....I think this will look great, once I paint it.
Hopefully, I will have the "after" next week. What are you working on?
**Linking to**
Not Just A Housewife
I'm at The Pink Pagoda!
Hi Everyone! I am so excited to be Guest Posting at The Pink Pagoda today!

I hope you come by and say "Hi"!
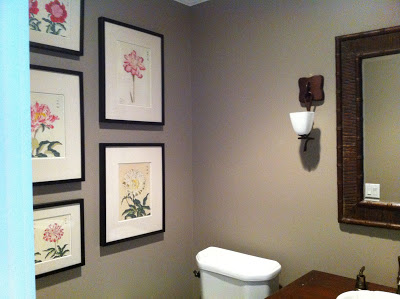
My pink pagoda Powder Room
I found the perfect print for my powder room. Well, actuall, I worked with The Pink Pagoda to create the perfect print! I have been a fan of these prints for quite some time. You may have seen the prints on Chinoiserie Chic. It is the perfect pop of color that the room needed.
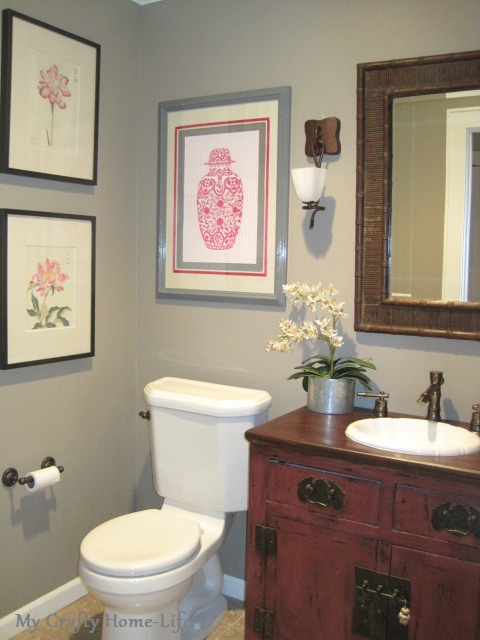
Here is how it started....I e-mailed Jennifer, the designer of The Pink Pagoda prints, this picture of my powder room. Knowing that the Ming Ginger Jar series was what I wanted, I just needed to confirm with her that coral was a good color for my room......WELL, I found someone equally crazy over the details as myself.
Since it is impossible to rely on a computer screen for color, we quickly realized that we both had the same Benjamin Moore fan decks...all through e-mail
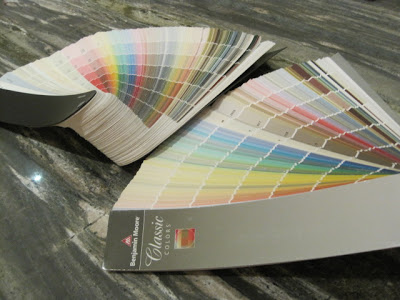
I color matched chips to my exsisting artwork and Jennifer custom matched colors for the Ginger Jar....then, this arrived!
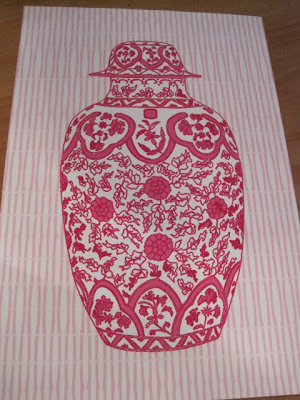
How beautiful is that?
I especially love how the colors are not exactly the same as my exsisting prints, but rather compliment them so well
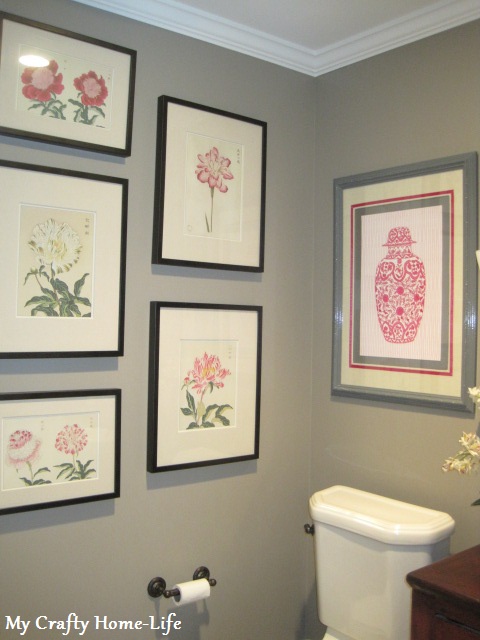
This print is so special, it required a custom frame. Please come back tomorrow to see a step-by-step on how I made this Mary Mcdonald inspired high gloss frame.