Upholstery 101 (week 4)
....continuing with the challenge, this is day 19 of 31.....for all 31, go here
This is also week 4 of my upholstery tutorial project.....
So, what color is my chair?

She's a coral (tomato red), not orange, not red chair

She doesn't shine enough though, so I think I will put a coat of bowling alley wax on her
Here is what I used
and it goes perfectly with the fabric I selected from my own hoarding collection.

This is a pattern that will definitely have to be centered

Keeping with a MacKenzie-Childs look, I will use a solid color on the seat, partly because this fabric is a bit light in weight, and a heavier fabric will wear better. Also, because she seems like she wants to have major whimsy!
So, what did I do this week? First, I removed the old two pieces of jute webbing on the back of the chair, and added new support webbing

stapeling it to the under-side of the top back piece (stapeling it to the front would make it too bulky).
Next, I wrapped the end around the bottom support piece and stapled it on the back side

I kept it taut, but did not need to pull super tight, repeat again

Then, working from the inside going across, I added more support

I ran the webbing bechind my vertical support (not a basket weave). This will help support the support!

...repeat that two more times

So much more back support then the original one

Onto the seat bottom. I usually cut fabric (especially burlap) from the entire yardage. If you are uncomfortable working this way, take a length and width measurement, add 4 inches or so each way, and cut a more workable piece. Lay the piece of burlap over the springs

tuck it under the supports to keep it close to the springs

trim off excess...you only need the burlap to cover the springs

Staple along the inside top edge. Not too tight

continue all the way around

Now, the inside back. Using the same method as the seat, staple the top middle

working top, bottom, top bottom, staple the bottom middle

pull from all directions, that way there won't be any excess burlap


trim excess burlap

Back view

This is also week 4 of my upholstery tutorial project.....
So, what color is my chair?
Here is what I used
 |
| Sun Dried Tomato |
This is a pattern that will definitely have to be centered
Keeping with a MacKenzie-Childs look, I will use a solid color on the seat, partly because this fabric is a bit light in weight, and a heavier fabric will wear better. Also, because she seems like she wants to have major whimsy!
So, what did I do this week? First, I removed the old two pieces of jute webbing on the back of the chair, and added new support webbing
stapeling it to the under-side of the top back piece (stapeling it to the front would make it too bulky).
Next, I wrapped the end around the bottom support piece and stapled it on the back side
Then, working from the inside going across, I added more support
I ran the webbing bechind my vertical support (not a basket weave). This will help support the support!
...repeat that two more times
So much more back support then the original one
Onto the seat bottom. I usually cut fabric (especially burlap) from the entire yardage. If you are uncomfortable working this way, take a length and width measurement, add 4 inches or so each way, and cut a more workable piece. Lay the piece of burlap over the springs
tuck it under the supports to keep it close to the springs
trim off excess...you only need the burlap to cover the springs
Staple along the inside top edge. Not too tight
continue all the way around
Now, the inside back. Using the same method as the seat, staple the top middle
working top, bottom, top bottom, staple the bottom middle
pull from all directions, that way there won't be any excess burlap
trim excess burlap
Back view
This concludes the least fun part of upholstery....the prep. From here on out, I find it really fun....
Hope to see you next Wednesday for the tutorial, and tomorrow for my 31 days!
Stripes (Day 16 of 31)
.....continuing with the challenge, this is day 16 of 31....for all 31, go here
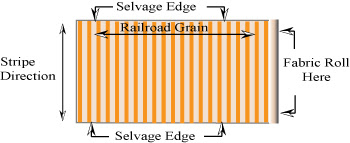
Yesterday, I spoke about plaids. Today, I would like to talk about stripes. Although stripes are not quite as difficult as plaids, they provide a challenge of their own. For stripes, you need to consider what you are upholstering. More specifically, the width. For the best results, you need to match the width of the project to the orientation of the stripes.
Stripes are oriented to the roll two ways; the first is railroaded
This is where you would want to use a railroaded stripe

So, after you figure out how wide your project is....which direction on the roll to find your stripes....then comes the difficult part....you now need to cut each an every piece with the stripes in mind
Yesterday, I spoke about plaids. Today, I would like to talk about stripes. Although stripes are not quite as difficult as plaids, they provide a challenge of their own. For stripes, you need to consider what you are upholstering. More specifically, the width. For the best results, you need to match the width of the project to the orientation of the stripes.
Stripes are oriented to the roll two ways; the first is railroaded
 |
| Drapery Education |
The back is wider than a roll of fabric. So, having it railroaded prevents a seam down the back.
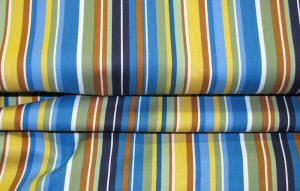
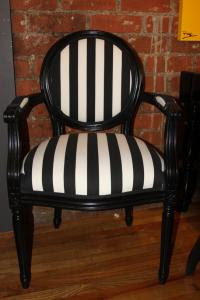
The next orientation, is stripes up the roll
This is a good example of a project that requires stripes going up the roll.
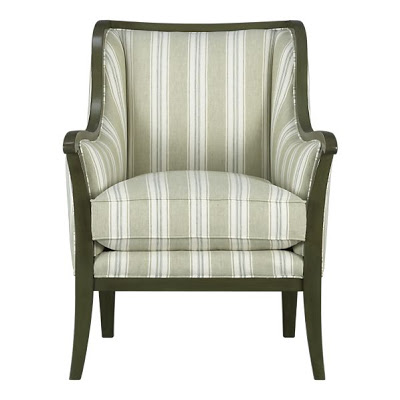
So, after you figure out how wide your project is....which direction on the roll to find your stripes....then comes the difficult part....you now need to cut each an every piece with the stripes in mind
For example, not only do you need to line up the center back, like this chair, you also need to line up all the other elements... cushion top, cushion side, and chair bottom.
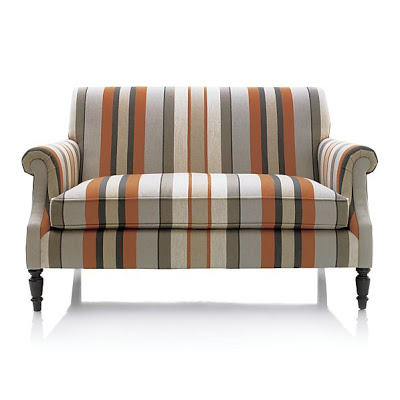
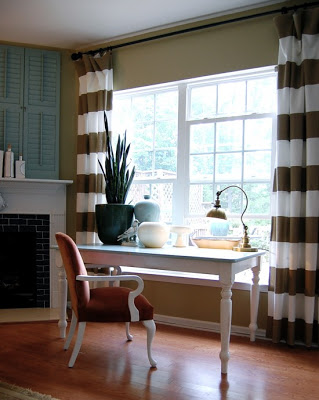
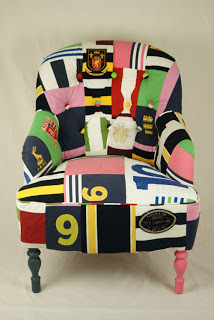
Now, it would never be my goal to scare you from using a plaid or a stripe. Instead, I hope that this would help you take projects into consideration so that it goes as easy as possible for you. Case in point
A perfect project to try a stripe! You only need to match one element...top to the bottom.
However, If you want to see determination, you can go to The Nester, and read all about how she made these drapes
using striped fabric that was up the roll....confused....check it out, and you will be uber impressed!
So, maybe you can forget everything I just told you about stripes?
Now, it would never be my goal to scare you from using a plaid or a stripe. Instead, I hope that this would help you take projects into consideration so that it goes as easy as possible for you. Case in point
 |
| RoomService |
However, If you want to see determination, you can go to The Nester, and read all about how she made these drapes
 |
| The Nester |
using striped fabric that was up the roll....confused....check it out, and you will be uber impressed!
So, maybe you can forget everything I just told you about stripes?
Plaids (Day 15 of 31)
....continuing with the challenge, this is day 15 of 31.....for all 31, go here
If you are still in the planning stages of your first upholstery project, then maybe this will help you in selecting fabric. Plaids and stripe can be very difficult. I have had my share of frustration when trying to keep lines straight. Here are a few things to consider when chosing a plaid.....
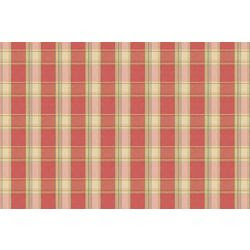
This is a one-way (uneven) plaid. What does that mean? If you look at the green vertical stripes, you will notice that they are on the right side of the white line.
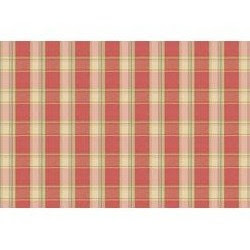

If you are still in the planning stages of your first upholstery project, then maybe this will help you in selecting fabric. Plaids and stripe can be very difficult. I have had my share of frustration when trying to keep lines straight. Here are a few things to consider when chosing a plaid.....
This is a one-way (uneven) plaid. What does that mean? If you look at the green vertical stripes, you will notice that they are on the right side of the white line.
When you rotate the fabric, you will notice how the green line is now on the left side of the white line
What does that mean to you? You will need to cut all of your pieces out with this in mind. If you chose to have the green line on the right, for example, every cut must be made with that in mind.
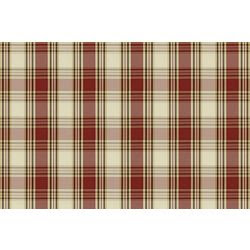
The next up is the two-way (even) plaid.
I didn't rotate this one, because you can see that rowtating the fabric won't change the stripe formation. An even plaid is a better choice of the two. However, It is still tricky to work with.
As I told you earlier, here are some of my plaid challenges.
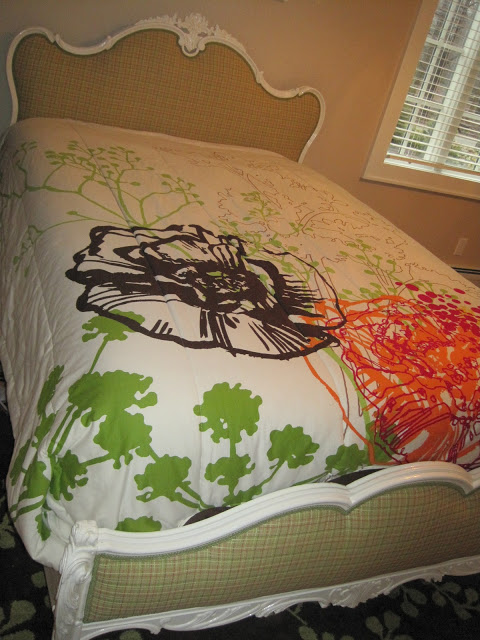
On the headboard, things went fine, all the curves helped....there wasn't a lot to match up or keep straight
However, on the footboard, you will notice on the upper left how I struggled to keep those lines straight. I had a friend helping me, and even then, it was quite the challenge. In fact, the instructor of the class pointed this example out to everyone to show how difficult plaids can be.
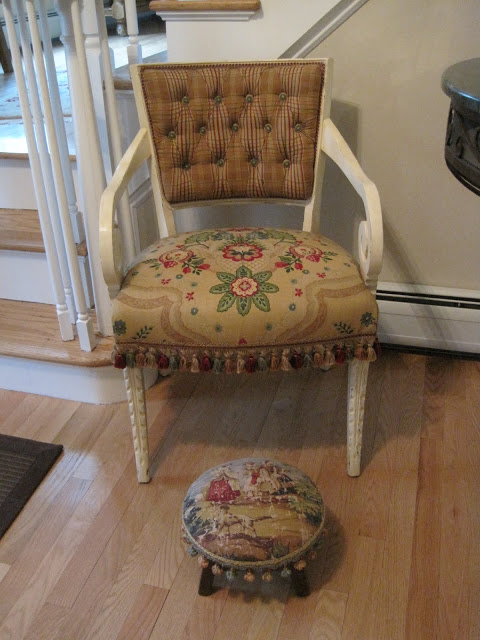
On the tufted back portion of this chair, working alone this time, I stapled, removed the staples, and restapled this many times. You can see how the lines with the buttons are not quite symetrical. I found the back so challenging, that I selected a coordinating fabric for the seat. I had enough of that.
Now you can appreciate this Ralph Lauren chair, via Elle Decor. Notice how the inside arm wraps over to meet the outside arm perfectly. All black lines match up.
Equally as impressive, look at the black line that is so uniformly distributed around the bottom edge of the chair. The lines are kept perfectly horizontal and vertical.
...and again, with this Anthropology chair, look at how the bottom panel of fabric is specifically set to highlight the darker stripe.
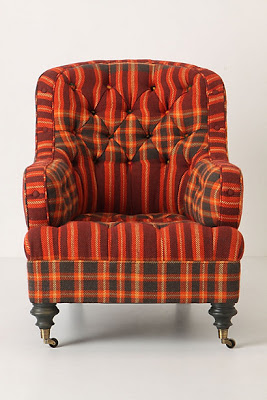 Again, I am impressed with the inside arm wrapping around to meet the inset fabric, and all of the small yellow lines match!
Do you think you are up for the challenge of a plaid?
...and again, with this Anthropology chair, look at how the bottom panel of fabric is specifically set to highlight the darker stripe.
Do you think you are up for the challenge of a plaid?
What color? (Day 13 of 31)
....continuing with the challenge, this is day 13....for all 31, go here
If you are following my upholstery tutorial, then you know I need to make a decision. First, which fabric? Sencond, what color should I paint the frame?
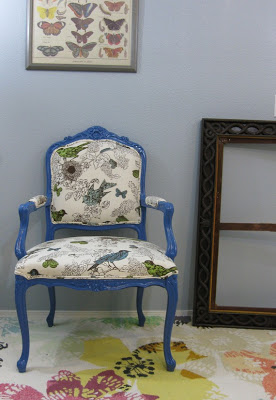
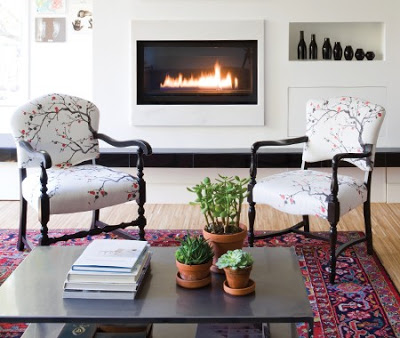
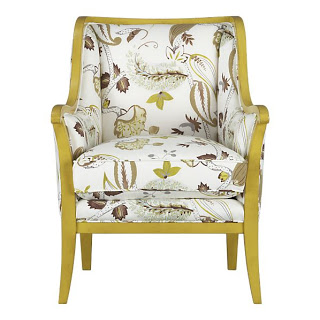
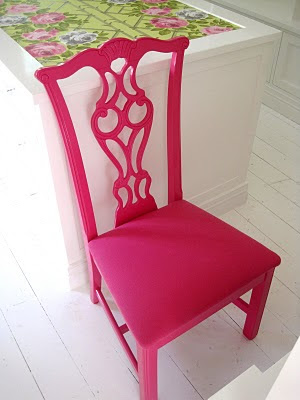
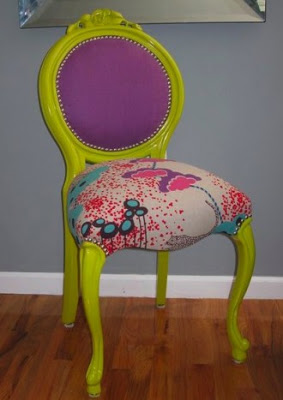
Here are some super chic painted chairs with coordinating upholstery
Do you have a favorite?
If you are following my upholstery tutorial, then you know I need to make a decision. First, which fabric? Sencond, what color should I paint the frame?
Here are some super chic painted chairs with coordinating upholstery
 |
| Etsy |
 |
| Curbly |
 |
| Source |
 |
| Source |
 |
| Crate & Barrel |
 |
| Absolutely Beautiful Things |
 |
| Divine Chair Co |
 |
| Divine Chair Co |
Do you have a favorite?
Upholstery 101 (week 3) (Day 12 of 31)
Welcome back to upholstery class. If you are new here, for week 1 - go here, for week 2 - go here
This is also day 12 of the challenge, for all 31, go here
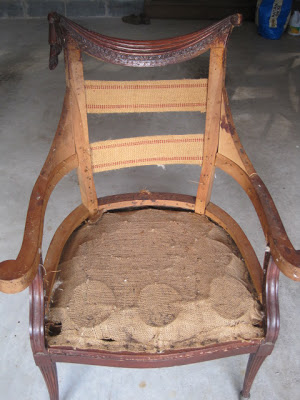
This is where I left off (except the burlap is off too)
So, NOW is the time to paint the frame! If you are not painting, do your prep and stain work.
First, fill in all cracks and dents with wood filler


lightly sand the wood filler. Also, lightly sand the entire frame so that the primer will stick

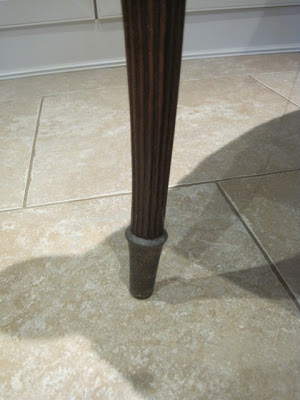
I removed the cute feet and will put them back on after the frame is painted
Using my favorite primer (the glue was from week 2)


This is also day 12 of the challenge, for all 31, go here
This is where I left off (except the burlap is off too)
So, NOW is the time to paint the frame! If you are not painting, do your prep and stain work.
First, fill in all cracks and dents with wood filler
lightly sand the wood filler. Also, lightly sand the entire frame so that the primer will stick
I removed the cute feet and will put them back on after the frame is painted
Using my favorite primer (the glue was from week 2)
I spray primed the chair frame
Here comes the confession, I have not picked my fabric yet, so I cannot finish my paining. I am trying not to pain it white, but rather have a pop of color. So, I will reveal the painted frame next Wednesday, week 4. Hope to see you then.