
Stripes (Day 16 of 31)
.....continuing with the challenge, this is day 16 of 31....for all 31, go here
Yesterday, I spoke about plaids. Today, I would like to talk about stripes. Although stripes are not quite as difficult as plaids, they provide a challenge of their own. For stripes, you need to consider what you are upholstering. More specifically, the width. For the best results, you need to match the width of the project to the orientation of the stripes.
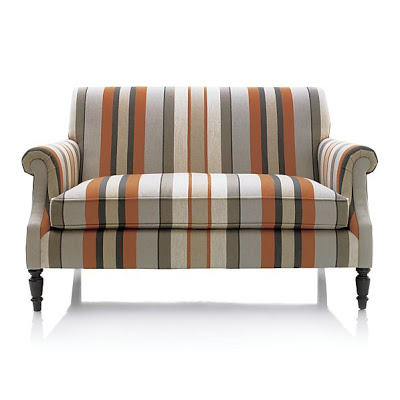
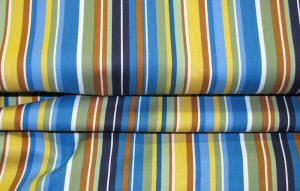
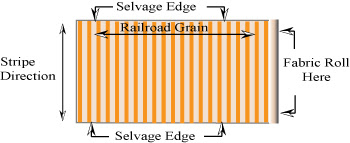
Stripes are oriented to the roll two ways; the first is railroaded
This is where you would want to use a railroaded stripe

So, after you figure out how wide your project is....which direction on the roll to find your stripes....then comes the difficult part....you now need to cut each an every piece with the stripes in mind
Yesterday, I spoke about plaids. Today, I would like to talk about stripes. Although stripes are not quite as difficult as plaids, they provide a challenge of their own. For stripes, you need to consider what you are upholstering. More specifically, the width. For the best results, you need to match the width of the project to the orientation of the stripes.
Stripes are oriented to the roll two ways; the first is railroaded
 |
| Drapery Education |
The back is wider than a roll of fabric. So, having it railroaded prevents a seam down the back.
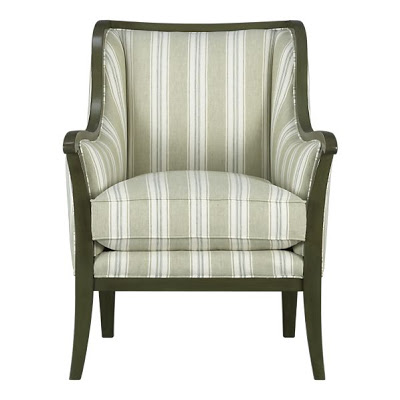
The next orientation, is stripes up the roll
This is a good example of a project that requires stripes going up the roll.
So, after you figure out how wide your project is....which direction on the roll to find your stripes....then comes the difficult part....you now need to cut each an every piece with the stripes in mind
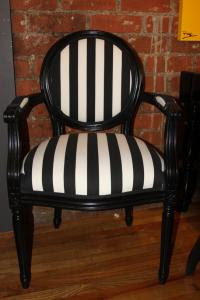
For example, not only do you need to line up the center back, like this chair, you also need to line up all the other elements... cushion top, cushion side, and chair bottom.
Now, it would never be my goal to scare you from using a plaid or a stripe. Instead, I hope that this would help you take projects into consideration so that it goes as easy as possible for you. Case in point
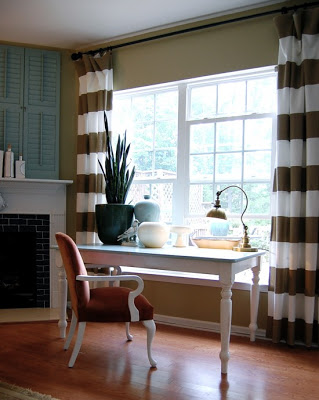
A perfect project to try a stripe! You only need to match one element...top to the bottom.
However, If you want to see determination, you can go to The Nester, and read all about how she made these drapes
using striped fabric that was up the roll....confused....check it out, and you will be uber impressed!
So, maybe you can forget everything I just told you about stripes?
Now, it would never be my goal to scare you from using a plaid or a stripe. Instead, I hope that this would help you take projects into consideration so that it goes as easy as possible for you. Case in point
 |
| RoomService |
However, If you want to see determination, you can go to The Nester, and read all about how she made these drapes
 |
| The Nester |
using striped fabric that was up the roll....confused....check it out, and you will be uber impressed!
So, maybe you can forget everything I just told you about stripes?
Plaids (Day 15 of 31)
....continuing with the challenge, this is day 15 of 31.....for all 31, go here
If you are still in the planning stages of your first upholstery project, then maybe this will help you in selecting fabric. Plaids and stripe can be very difficult. I have had my share of frustration when trying to keep lines straight. Here are a few things to consider when chosing a plaid.....
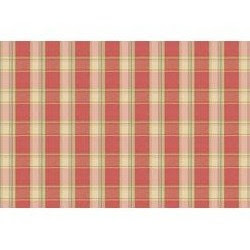
This is a one-way (uneven) plaid. What does that mean? If you look at the green vertical stripes, you will notice that they are on the right side of the white line.

If you are still in the planning stages of your first upholstery project, then maybe this will help you in selecting fabric. Plaids and stripe can be very difficult. I have had my share of frustration when trying to keep lines straight. Here are a few things to consider when chosing a plaid.....
This is a one-way (uneven) plaid. What does that mean? If you look at the green vertical stripes, you will notice that they are on the right side of the white line.
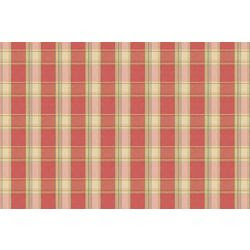
When you rotate the fabric, you will notice how the green line is now on the left side of the white line
What does that mean to you? You will need to cut all of your pieces out with this in mind. If you chose to have the green line on the right, for example, every cut must be made with that in mind.
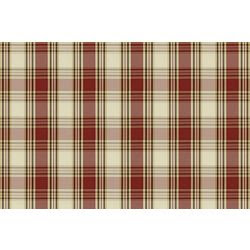
The next up is the two-way (even) plaid.
I didn't rotate this one, because you can see that rowtating the fabric won't change the stripe formation. An even plaid is a better choice of the two. However, It is still tricky to work with.
As I told you earlier, here are some of my plaid challenges.
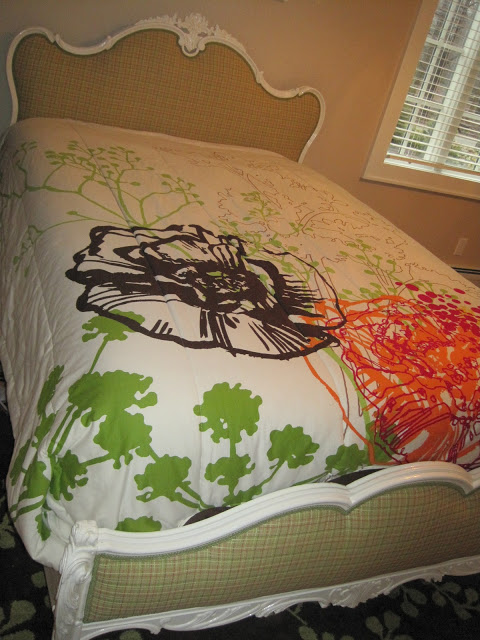
On the headboard, things went fine, all the curves helped....there wasn't a lot to match up or keep straight
However, on the footboard, you will notice on the upper left how I struggled to keep those lines straight. I had a friend helping me, and even then, it was quite the challenge. In fact, the instructor of the class pointed this example out to everyone to show how difficult plaids can be.
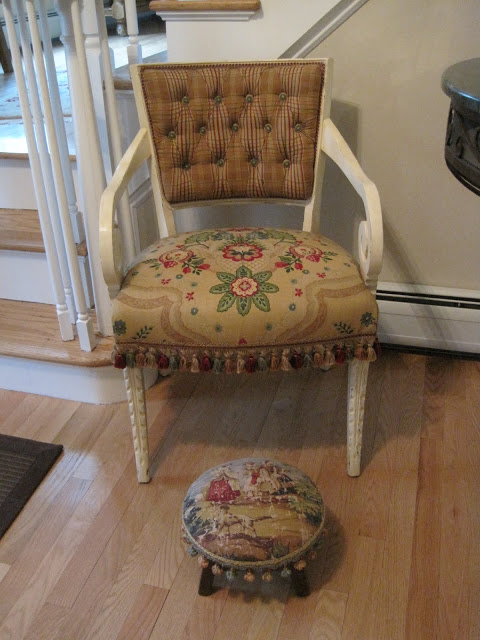
On the tufted back portion of this chair, working alone this time, I stapled, removed the staples, and restapled this many times. You can see how the lines with the buttons are not quite symetrical. I found the back so challenging, that I selected a coordinating fabric for the seat. I had enough of that.
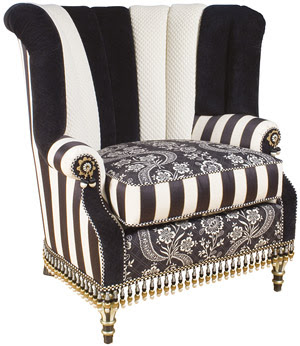
Now you can appreciate this Ralph Lauren chair, via Elle Decor. Notice how the inside arm wraps over to meet the outside arm perfectly. All black lines match up.
Equally as impressive, look at the black line that is so uniformly distributed around the bottom edge of the chair. The lines are kept perfectly horizontal and vertical.
...and again, with this Anthropology chair, look at how the bottom panel of fabric is specifically set to highlight the darker stripe.
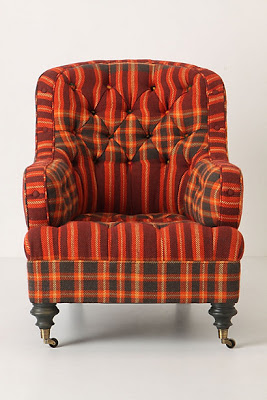 Again, I am impressed with the inside arm wrapping around to meet the inset fabric, and all of the small yellow lines match!
Do you think you are up for the challenge of a plaid?
...and again, with this Anthropology chair, look at how the bottom panel of fabric is specifically set to highlight the darker stripe.
Do you think you are up for the challenge of a plaid?
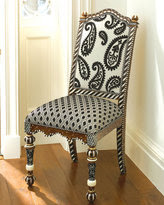
MacKenzie-Childs Upholstery (Day 14 of 31)
...continuing on with the challenge, this is day 14 of 31....for all 31, go here
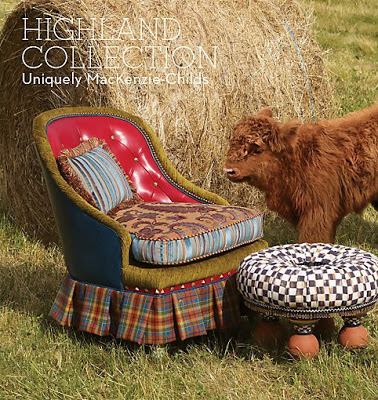
I think my love for whimsy came from Mackenzie-Childs. If you are not familiar with their story, you can read it here. They are definitely DIY-ers!! I am still inspired by them; probably because of their love for a little girl and her dreams.
Today, I am using my upholstery post to pay homage to Mackenzie-Childs. The duo who gave us all permission to just try anything
 look at all the texture changes
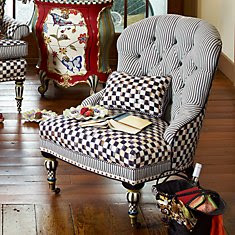 the shape is so classic
 This makes me think that I need to take more risks in decorating
 Are you smiling over this?
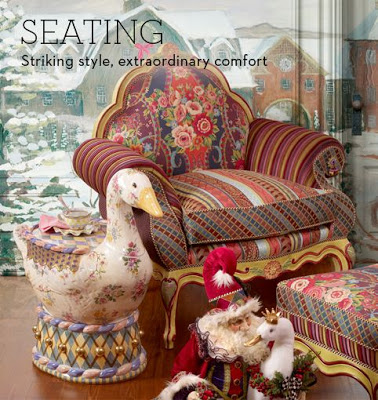 I'm getting very inspired over this one
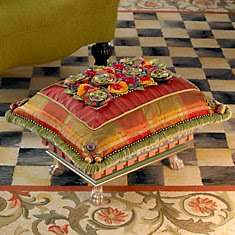
 The one staple piece of theirs that I still love
 Now this is one that could be copied, with a twist!
 Did you catch that the window has 3 colors (sill, shutters, frame) on it?
 Fit for a
 King Queen
I am in love with that tassel fringe. Do you see it on the end of the arms, too?
 Do you see the beaded fringe glued to the wood frame?

I think my love for whimsy came from Mackenzie-Childs. If you are not familiar with their story, you can read it here. They are definitely DIY-ers!! I am still inspired by them; probably because of their love for a little girl and her dreams.
Today, I am using my upholstery post to pay homage to Mackenzie-Childs. The duo who gave us all permission to just try anything
I am in love with that tassel fringe. Do you see it on the end of the arms, too?
Now that is how to paint a frame that will coordinate with the upholstery!
Where do you find your inspiration for your next project?
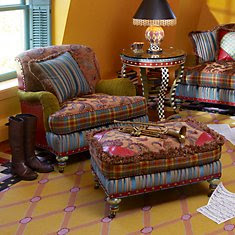
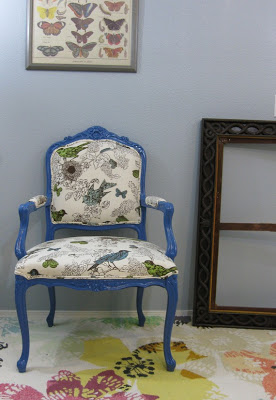
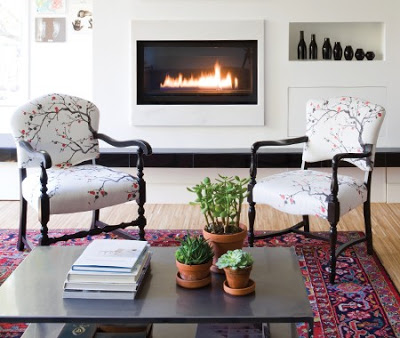
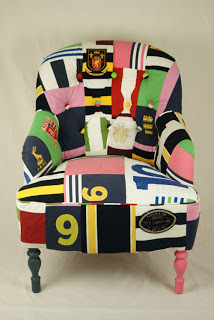
What color? (Day 13 of 31)
....continuing with the challenge, this is day 13....for all 31, go here
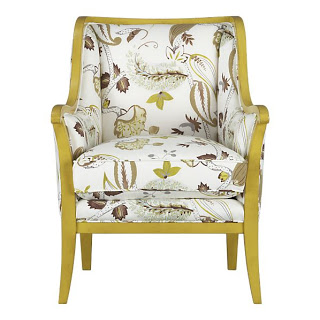
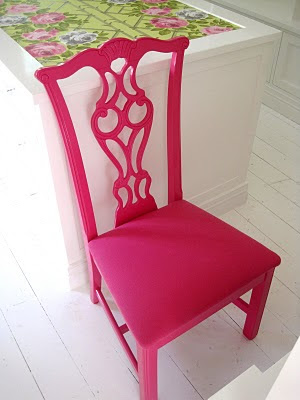
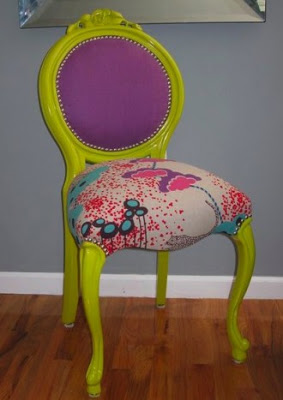
If you are following my upholstery tutorial, then you know I need to make a decision. First, which fabric? Sencond, what color should I paint the frame?
Here are some super chic painted chairs with coordinating upholstery
Do you have a favorite?
If you are following my upholstery tutorial, then you know I need to make a decision. First, which fabric? Sencond, what color should I paint the frame?
Here are some super chic painted chairs with coordinating upholstery
 |
| Etsy |
 |
| Curbly |
 |
| Source |
 |
| Source |
 |
| Crate & Barrel |
 |
| Absolutely Beautiful Things |
 |
| Divine Chair Co |
 |
| Divine Chair Co |
Do you have a favorite?
Upholstery 101 (week 3) (Day 12 of 31)
Welcome back to upholstery class. If you are new here, for week 1 - go here, for week 2 - go here
This is also day 12 of the challenge, for all 31, go here
This is where I left off (except the burlap is off too)
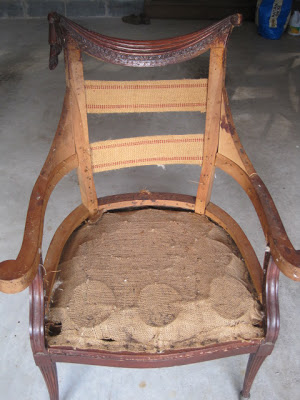
So, NOW is the time to paint the frame! If you are not painting, do your prep and stain work.
First, fill in all cracks and dents with wood filler


lightly sand the wood filler. Also, lightly sand the entire frame so that the primer will stick

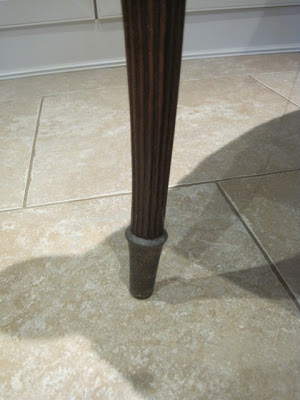
I removed the cute feet and will put them back on after the frame is painted
Using my favorite primer (the glue was from week 2)


This is also day 12 of the challenge, for all 31, go here
This is where I left off (except the burlap is off too)
So, NOW is the time to paint the frame! If you are not painting, do your prep and stain work.
First, fill in all cracks and dents with wood filler
lightly sand the wood filler. Also, lightly sand the entire frame so that the primer will stick
I removed the cute feet and will put them back on after the frame is painted
Using my favorite primer (the glue was from week 2)
I spray primed the chair frame
Here comes the confession, I have not picked my fabric yet, so I cannot finish my paining. I am trying not to pain it white, but rather have a pop of color. So, I will reveal the painted frame next Wednesday, week 4. Hope to see you then.
Inspirational Upholstery (Day11 of 31)
....continuing with the challenge, day 11....for all 31, go here
This is a crazy week. My mom is visiting form California, and I am trying to do too many things. Since tomorrow is upholstery class day, today I will share my inspiration thoughts. I don't know what to do with my family room. I can't decide on a color scheme.
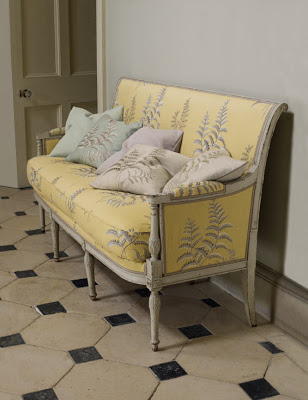
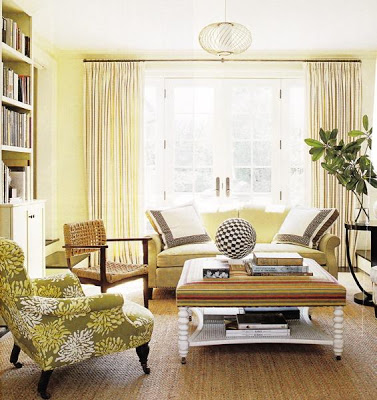
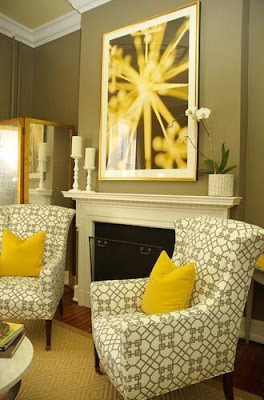
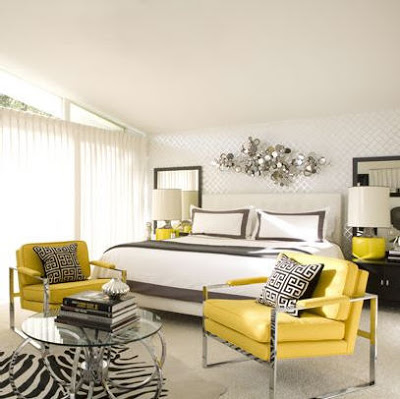
I think I like yellow and gray for the upholstery?
This is a crazy week. My mom is visiting form California, and I am trying to do too many things. Since tomorrow is upholstery class day, today I will share my inspiration thoughts. I don't know what to do with my family room. I can't decide on a color scheme.
I think I like yellow and gray for the upholstery?
 |
| Source |
 |
| Source |
 |
| Apartment Therapy |
 |
| Source |
 |
| Source |
I'm just not sure.....what do you think?